JavaScript 對象。 第 8 部分 JavaScript 課程從初學者到高級,共 10 篇博文
已發表: 2021-11-08這是 JavaScript 博客文章系列的第 8 部分,它將帶您從初學者到高級。 如果你還沒有閱讀過上一篇關於 JavaScript 函數的博文,你可以在這裡查看。 在本系列結束時,您將了解開始使用 JavaScript 編碼所需的所有基礎知識。 事不宜遲,讓我們開始第八個教程。
JavaScript 對象 - 目錄:
- JavaScript 對象
- 對象構造函數
JavaScript 對象
JavaScript 對象扮演著重要的角色。 雖然這是一個相對較大的主題,但也相對容易理解它們。 理解對象的最常見方法之一是在使用代碼重新創建汽車時考慮它。 在處理對象時,我們將有兩個主要概念。 它們將具有屬性和方法。 屬性是javascript對象擁有的東西,方法是對象可以執行的東西。 讓我們通過一些例子來看看。
// let's define multiple objects to have a better understanding
const plane = {
    numberOfWings: 2,
    canFly: true,
    takeOff: function(){return "Plane starts taking off..."},
    land: function(){return "Plane starts landing..."}
    }
const car = {
    brand: "Tesla",
    isElectric: true,
    numberOfDoors: 4,
    moveForward: function(){return "The car moves forward..."},
    smartSummon: function(){return "The car starts driving itself to you..."}
}
// we can access and console log the properties they have:
console.log("The properties for the plane:");
console.log("Can fly: " + plane.canFly);
console.log("Total number of wings: " + plane.numberOfWings);
// we can also make the plane perform actions
console.log(plane.takeOff());
console.log(plane.land());
// if you take a closer look, you can see that
// we do not directly console.log the actions inside the methods
// instead we return them from the functions
// and in this case we are console logging them
// this way if we want we can also give the user an alert
// that tells the plane is taking off
alert(plane.takeOff());
// we can also learn about the properties the car has
// and console log them as well for additional practice
console.log("Is it an electric car? " + car.isElectric);
console.log("What is the brand of the car: " + car.brand);
console.log("How many doors does it have? " + car.numberOfDoors);
console.log(car.smartSummon());
console.log(car.moveForward());
當我們運行上面的代碼時,我們應該得到以下輸出:
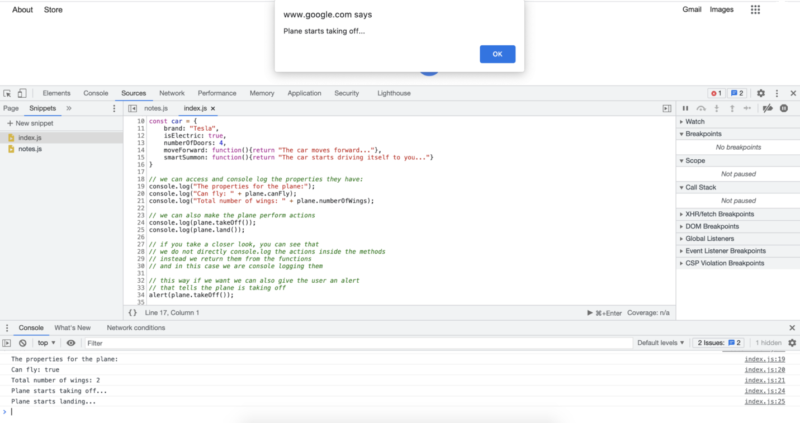
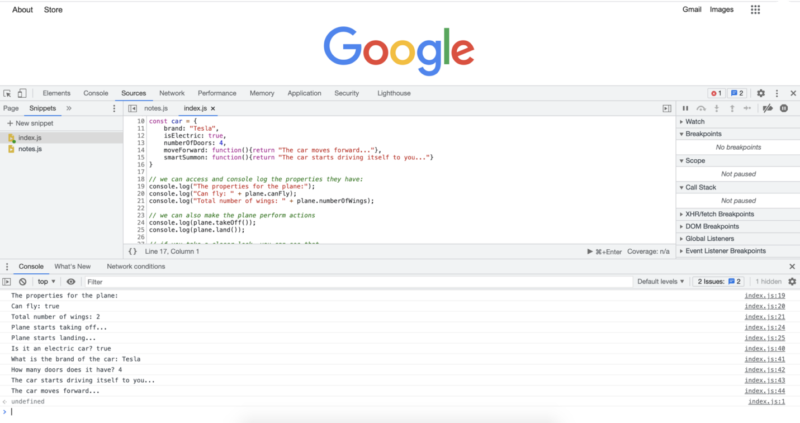
我們剛剛看到了兩個主要的 javascript 對象示例:一個是飛機,一個是汽車。 就像飛機和汽車有不同的屬性和它們可以做的不同的事情一樣,我們創建的不同對象可以做不同的事情並具有不同的屬性。 如果您仔細觀察,您會開始看到我們定義對象、屬性和方法的方式的模式。
我們開始定義對象就像我們定義變量或常量一樣,在這種情況下,通常在定義 javascript 對象時使用常量就足夠了。 但是,不像我們對常規常量所做的那樣簡單地將該常量分配給一個值,現在我們打開和關閉一組花括號,並實質上以鍵值對的形式提供數據。 請注意,定義屬性和方法非常相似。 主要區別在於,在定義屬性時,我們將名稱分配給稍後將檢索的值。 但是,當我們定義一個方法時,我們必須提供一個稍後將運行的函數。 這種差異也反映在我們以後如何稱呼它們上。 例如:
// when we retrieve a property we do not use brackets at the end
console.log("Can fly: " + plane.canFly);
// when we retrieve methods,
// we also run them by adding brackets after them
// methods here are essentially functions that
// belong to a specific object
console.log(plane.takeOff());
重要的是我們在方法之後添加括號,就像我們對常規函數所做的那樣。 否則,我們將只擁有函數本身而不是執行函數。
// in order to execute the object method we should
// add the parenthesis right after the method name
// otherwise we will get the method definition
// like in this example
alert(plane.takeOff);
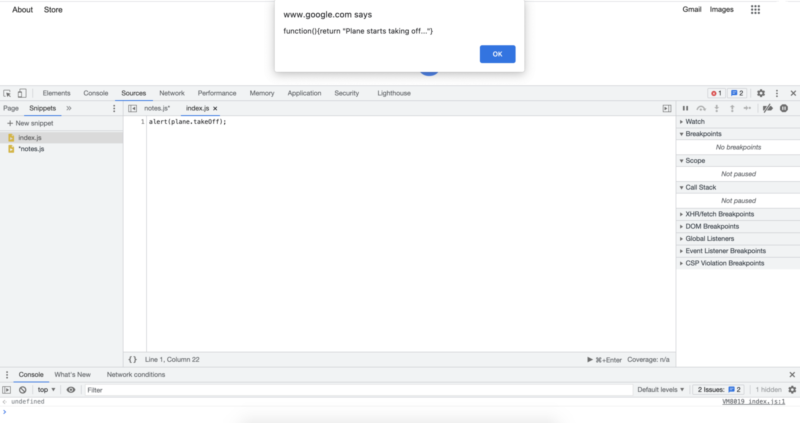
顯示的結果正是我們在創建方法時定義的。 您還可以看到我們正在定義一個函數。 在這種情況下,我們定義沒有名稱的函數,這在 JavaScript 中是可能的。 這並不總是可取的,因為給函數命名可以讓我們在看到它被顯示時更清楚。 然而,在這種情況下,我們沒有在對象定義之外的任何其他地方使用該函數,我們不必直接為函數命名。 相反,我們可以使用我們為其分配的方法名稱從對像中引用該函數。

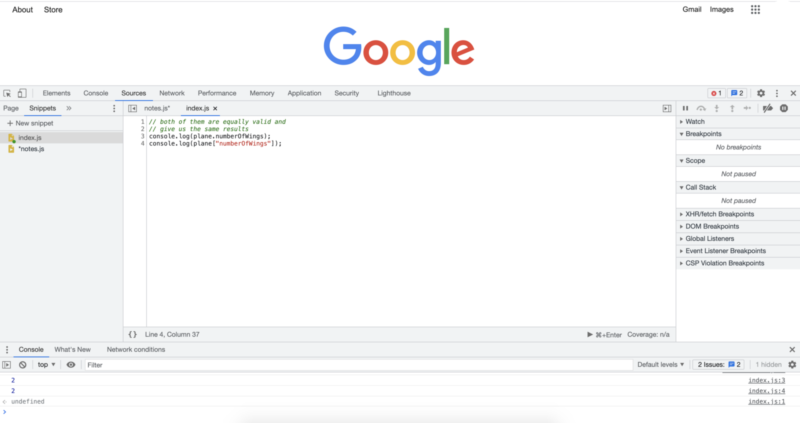
關於從對像中檢索屬性或方法,您應該知道的另一件事是,實現這一目標的方法不止一種。 我們在上面的示例中使用了最常見的做法之一,即使用點表示法。 但是還有另一種常用的方法可以實現相同的結果,你應該知道。 第二種表示法使用方括號和引號。
// both of them are equally valid and
// give us the same results
console.log(plane.numberOfWings);
console.log(plane["numberOfWings"]);
// check out the JavaScript console for the results
很高興我們可以存儲許多可以使用對象執行的詳細屬性和操作,但是如果我們需要使用對象,不僅僅是 1 輛汽車,而是 20 輛汽車、100 輛汽車,甚至 1,000,000 輛汽車,每輛汽車都有一個唯一 ID 和不同的屬性值。 我們是否必須從頭開始為每輛車輸入整個代碼? 答案是不。 相反,我們可以利用稱為對象構造函數的東西。
對象構造函數
對象構造器可以極大地加速你的編碼過程,並且可以顯著地使你的代碼更加干燥。 使用對象構造函數,我們本質上定義了對象的藍圖。 一旦我們有了對象的藍圖,我們就可以以更清晰的方式創建盡可能多的對象實例,而重複次數要少得多。 讓我們通過一些例子來看看。
// this is how we define a blueprint for the objects
function Car(id, color, isElectric, numberOfDoors){
    this.id = id;
    this.color = color;
    this.isElectric = isElectric;
    this.numberOfDoors = numberOfDoors;
}
// this is how we can instanciate the
// javascript objects we want to create from
// the blueprint we defined above
// in this case we create 3 car objects
// with diffent values for the properties
const car1 = new Car(1, "white", true, 4);
const car2 = new Car(2, "black", true, 2);
const car3 = new Car(3, "red", false, 4);
// we can access object properties just like we did before
console.log("Color of first car is: " + car1.color);
console.log("Color of second car is: " + car2.color);
console.log("Color of third car is: " + car3.color);
運行上面的代碼會給我們以下代碼輸出:
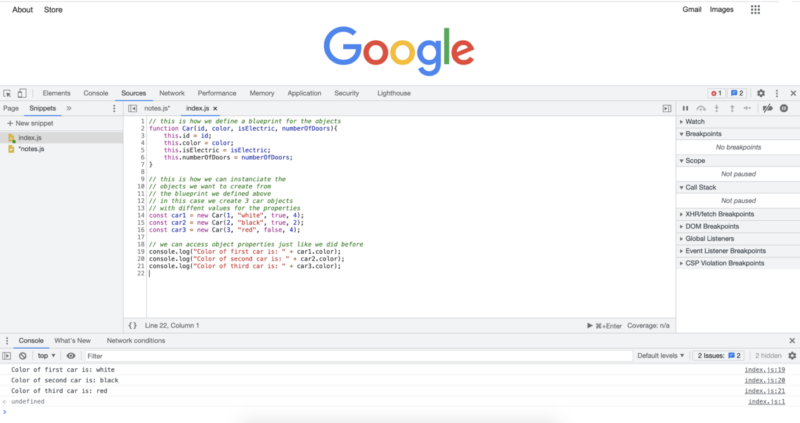
從上面的代碼可以看出,一旦我們有了藍圖,我們就可以簡單地傳遞不同的值來從初始藍圖創建不同的 javascript 對象。 您可能注意到的一件事是對象構造函數的命名約定是將第一個字母大寫。 在這種情況下,我們沒有將其定義為“汽車”,而是將其命名為“汽車”。 如果我們要創建一個平麵類,我們將其命名為“Plane”。
當我們想從我們定義的藍圖創建對象時,我們使用關鍵字“new”,然後寫下我們想要使用的對象構造函數的名稱。 在名稱之後,我們打開和關閉一組括號,並傳入我們想要創建對象的參數。 請注意,我們不重複參數名稱,我們只是按照與參數相同的順序傳遞值。 您可能還注意到,在創建藍圖時,我們使用了一個名為“this”的關鍵字。 現在,您應該知道“this”關鍵字允許引用對象本身,它是我們在為對象創建藍圖時應該編寫的樣板代碼的一部分。
當您學習編碼時,您可能會聽到“樣板代碼”一詞,這實際上很常見,尤其是在 Web 開發中。 這基本上意味著我們編寫了部分代碼來進行某些設置。 即使我們沒有為代碼提供獨特的解決方案,但我們確實必須寫出這些部分才能獲得有效的代碼。 根據樣板代碼,一些 IDE 甚至提供提供這些樣板代碼的快捷方式。
我們剛剛學習的 javascript 對像是一個很大的話題,隨著我們深入研究,它會包含許多細節。 但從根本上講,您應該知道我們可以通過使用對象的代碼來模仿現實生活中的對象。 這些 javascript 對象可以具有我們可以訪問和執行的不同屬性和方法。
在下一個教程中,我們將發現更多在 JavaScript 中非常重要和常用的主題和概念。
作者:羅伯特·惠特尼
JavaScript 專家和指導 IT 部門的講師。 他的主要目標是通過教其他人如何在編碼時有效合作來提高團隊生產力。
10 篇博文中從初級到高級的 JavaScript 課程:
- 如何開始用 JavaScript 編碼?
- JavaScript 基礎
- JavaScript 中的變量和不同的數據類型
- 片段和控制結構
- While 循環和 for 循環
- Java 數組
- JavaScript 函數
- JavaScript 對象
- JavaScript 方法等
- JavaScript 課程總結
